Hello lovelies,
How are your Bookbag Backpacks coming along so far?
Today we are going to move our sewing project forward, attach the back straps and the top handles and make the front pockets. Let’s get sewing!
Attach the back straps
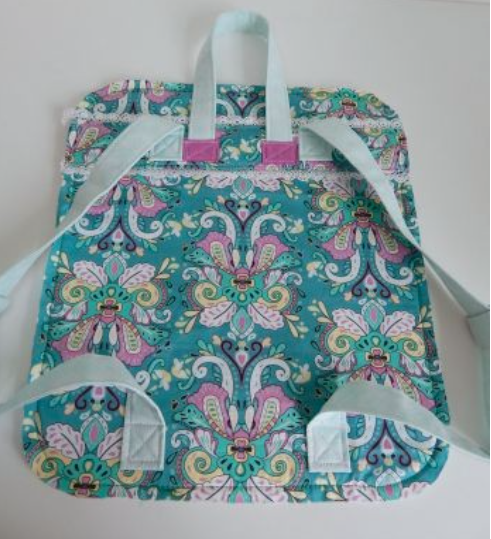
First, on the right side of the strap support (E), position the end of the back strap (I) 3” (7.5cm) from the left and 1/4” (6mm) from the bottom, right side down (This should be the strap with the triglide attached, and it will extend over the top of the strap support).Stitch into place using a cross inside a square. For a tutorial on how to sew a cross inside a square, please see my tutorial! Rivets can be added later, if you opted for using them.
Repeat for the second back strap but 3” (7.5cm) from the right of your strap support.
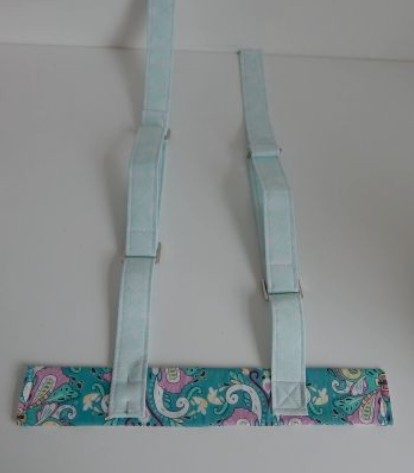
If you’re using trim, baste it to the back of the top and bottom of the strap support (E), moving the back straps (I) out of the way.
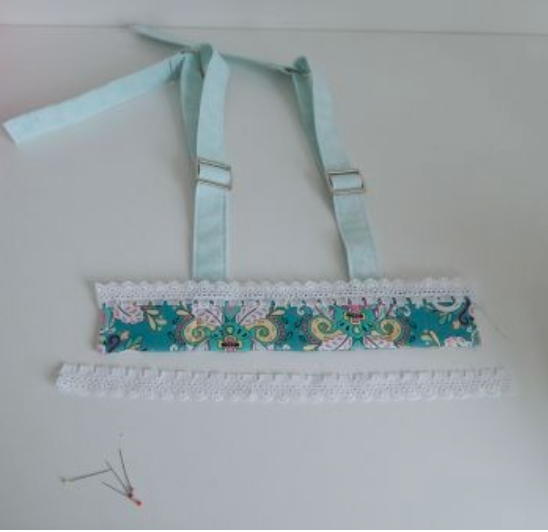
Attach the strap support to the one to the main body pieces
Place the strap support (E), straps up on top of the back Backpack main (A) 2” (5cm) from the top, with the straps extending over the top edge and top stitch along the top and bottom of the support piece, stitching over the back straps. If you wish to insert rivets, you can now set them in the centre of the cross you’ve sewn.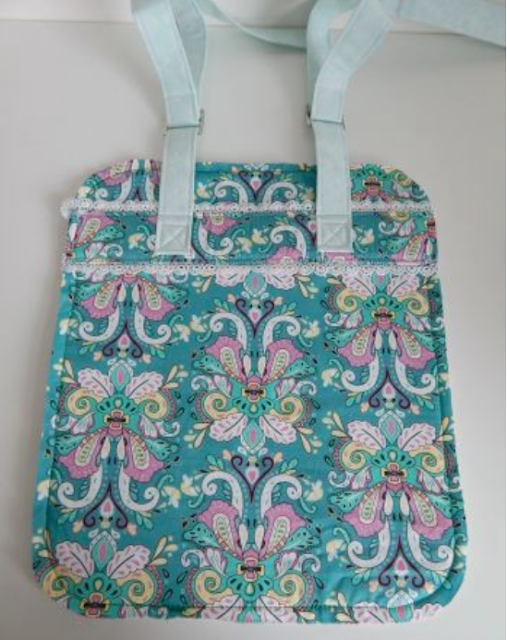 Fold one of the long straps down and attach using a cross inside a square stitch to the backpack main (A) 3” (7.5cm) from the side and 3/4” (2cm) from the bottom. Repeat for your other strap. If you wish to insert rivets, then place them in the centre of the cross.
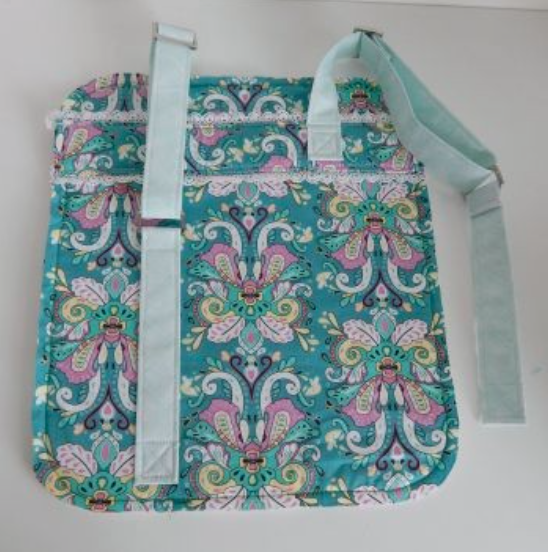
Create the front pockets
For more photos of fitting a zipped pocket, please see my tutorial!
To create the hidden front zipped pocket lay one interfaced pocket piece (L) in the centre of the front outer body main (A) right sides together. Position it approximately 1/2” (12mm) from the bottom edge, side centred, and pin at the edges. Measure the teeth of the zip and draw a box with a fabric marker the length of the zip teeth with a height of 3/8” (1cm). Position the box in the centre of piece (L) about 6” (15cm) from the bottom of pocket piece (L).
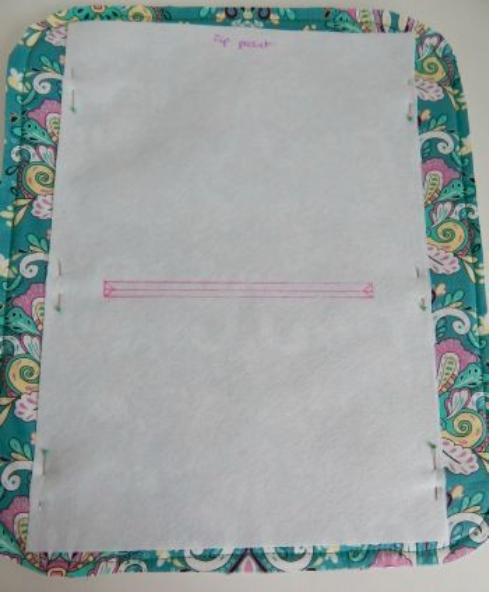 Draw a triangle at each end within the box and connect with a central line. This is where you will cut through both layers once sewn.
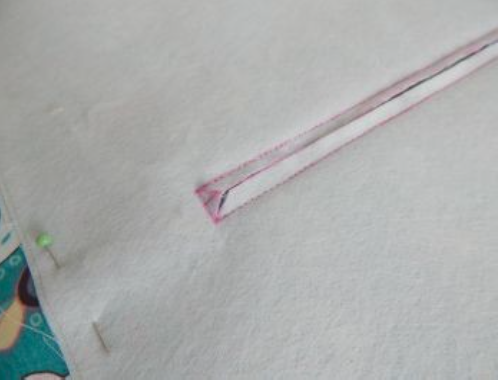
Sew around the box and then cut through the triangles and central line. Clip very close to the corners without cutting through the stitching.
Push the pocket piece (L) through the body main (A) to the back. Press well and manipulate the fabric to lay flat. Trim any bulky stabiliser around the opening. Pin, baste or use fabric glue to secure the zip to the back of the pocket and lining with the teeth showing through the gap. You may find it handy to stitch the end of the zip before you baste.
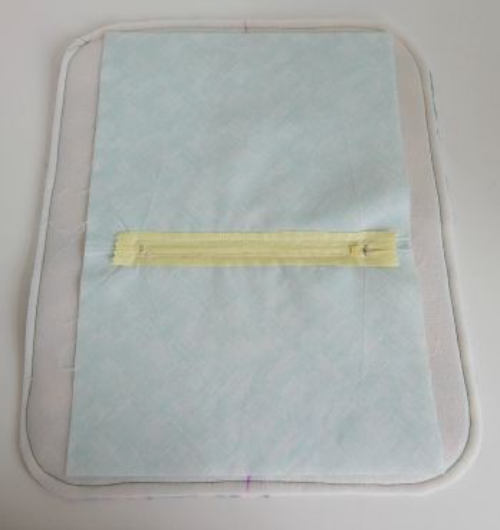
This is how the zipper will look like before you sew it from the front side of the fabric, before trimming away the stabiliser. In the original pattern, the lining of the pocket doesn’t show on the right side, but it’s something you can do, as well, if you like it.
To sew the zipper, change your presser foot to the zip foot to sew. For really straight stitching I recommend an adjustable zipper/piping foot. These types of zips do take practise but if you’re slow and steady you can achieve a professional finish easily.
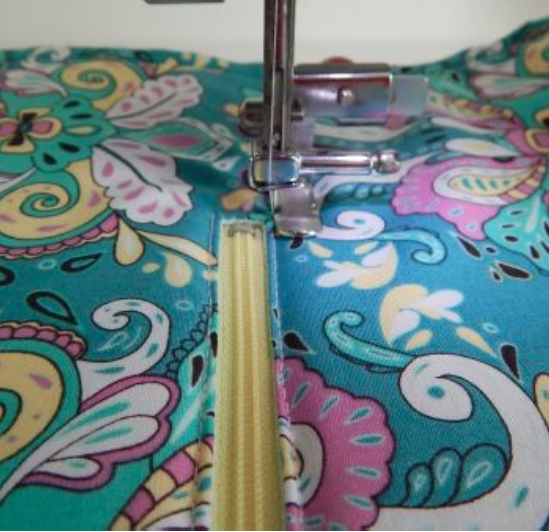
Sew along the edge of the zip opening keeping the zip straight. As you approach the zip pull leave the needle down and lift the presser foot. Unzip the zip until the pull is out of the way, lower the presser foot and sew on until you need to re-zip.Continue around all 4 sides of the opening.
Fold the top down to meet the bottom of the pocket piece (L) and sew around the three open sides, without catching the front body main (A) fabric.
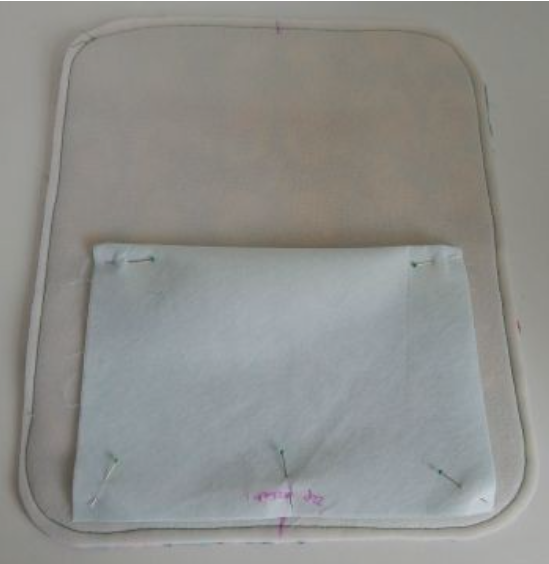
If you need more help with this step, please refer to the pattern, where you can find more illustrations!
Construct the front slip pocket
If using decorative trim, baste it to the front pocket piece, with the decoration at least 3/8” (1cm) from the top of the pocket piece, to ensure this will be seen once sewn. Then, with right sides together, stitch the front pocket (B), outer and lining together along the top edge, sandwiching the decorative trim.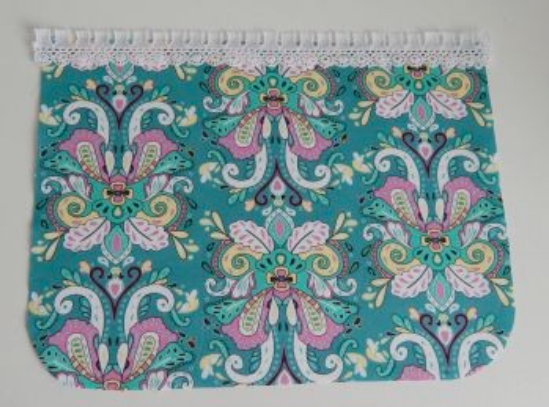
If you’re not using a decorative trim, stitch along the front pocket piece (B) and lining toghether along the top edge, right sides together. Turn right side out, press and top stitch two rows along the top edge for extra stability.
Next, position the front pocket (B) over the front body main (A) with zipped pocket, lining up the sides and bottom, and baste into place, ensuring you don’t catch the back zipped pocket piece (L) in the seams.
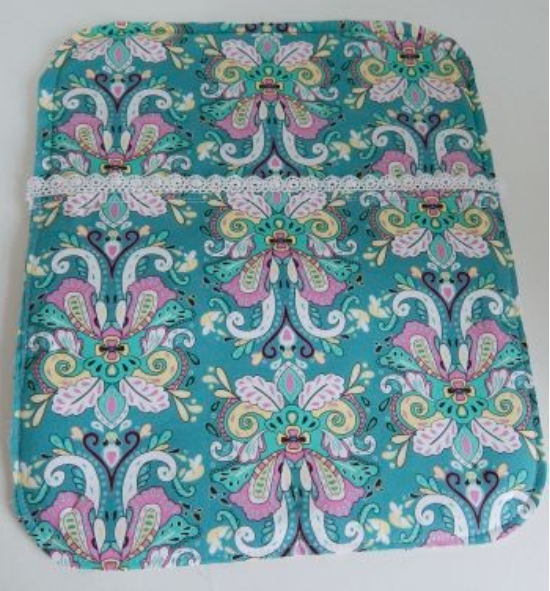
Attach the top handles
Position one top handle, 4 1/2” (11.5cm) from the side and the bottom of the tab, 3” (7.5cm) from the top. Stitch the tab (G) to the body main (A) using a cross inside a square. If you wish to reinforce with a rivet, now is the time. Place a rivet in the centre of the cross in the square.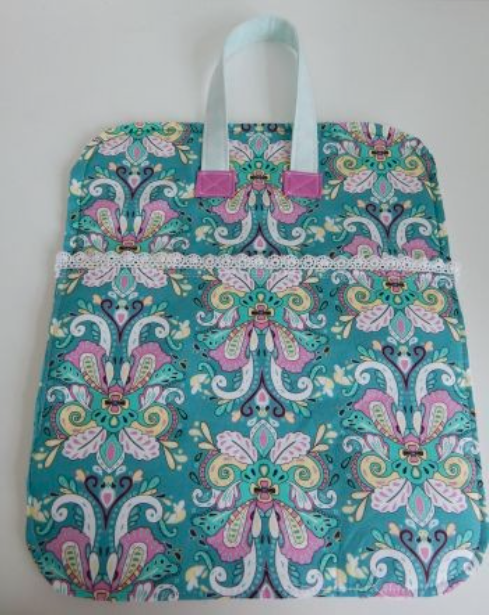 Repeat steps 43 & 44 for the other end of the handle. You should have approx. 1 6/8” (44mm) between each tab. Repeat for the second top handle, on the back body main, positioning handle just inside the back straps.
 You may wish to pin the back straps out of the way while sewing the handles.
 And that’s it for today! See you next week, when we’ll tackle the zip gusset!
In case you’ve missed our last three weeks, here’s what we did:
- Gathering supplies
- Cut and stabilise pattern pieces
- Create top handles and backpack straps
Ten articles before and after
Blog – Foam Stabilisers Comparison 2.0 Sewing Patterns by Junyuan bags
Blog – Sew Along Week 5: Creating the zip and gusset Sewing Patterns by Junyuan bags
Blog – 8 Sewing Quotes to Challenge How You Think About Sewing Sewing Patterns by Junyuan bags
Blog – Sew Along Week 6: Attaching the lining and finishing your bag Sewing Patterns by Junyuan bags
Blog – Tiny Bag Co – All About Tanya! Sewing Patterns by Junyuan bags
Blog – Leather sofas to Handmade bags! Sewing Patterns by Junyuan bags
Blog – Sew Along Week 3: Create top handles and backpack straps Sewing Patterns by Junyuan bags
Blog – How to sew a cross in a square without stopping Sewing Patterns by Junyuan bags
Blog – Sew along Week 1: Bag making supplies Sewing Patterns by Junyuan bags


 Mobile/What's App/Wechat
 E-Mail
 ADD
ADD


