Hi lovelies,
Today is our last construction post of the Bookbag Backpack sew along! Just to recap, here are the steps we covered in the last few weeks:
- Gather supplies
- Cut and stabilise pattern pieces
- Create top handles and backpack straps
- Attach the back straps and the top handles and make the front pockets
- Create the cross-body strap, zip and gusset
So let’s start!
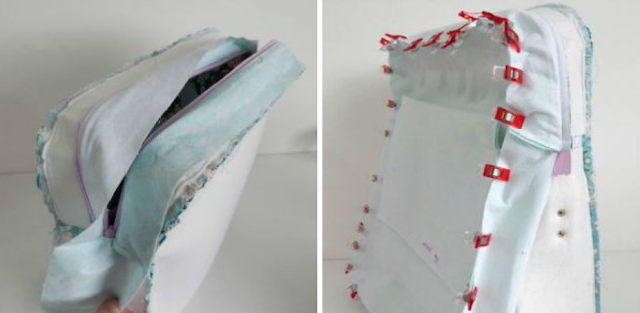
Attach the outer body
First, separate the outer side gusset (C) from the lining side gusset and pin it to the body main front (A) with the pocket (B) to one edge of the side gusset. Try your best calm pose to ignore (and not sew over) the lining gussets while you are dealing with the outer pieces.
Match the centre of the zip gusset (D) with the centre of the backpack front main (A), then stitch in place, with the gusset piece on top. You may find it helpful to pin the top handles down, out of the way.

Next, open the zip fully and then repeat for the second bag main (A) with the back straps attached.
Notch the curves without going through your stitching line. You can do this by trimming the seam allowance with a pair of pinking shears. Then place it aside.
If you didn’t already mark the centres of the zip gusset and side gusset on your linings, now is a good time to do so.
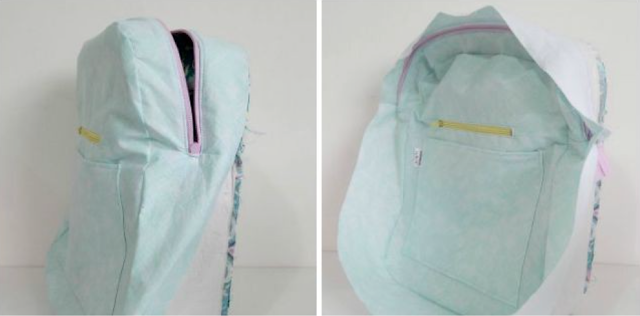
Construct the lining
To start, position the zipped pocket 4” (10cm) from the bottom, centred on the lining bag main (A) panel. Insert the zipped pocket into the lining following instructions from last week: Create the cross-body strap, zip and gusset .
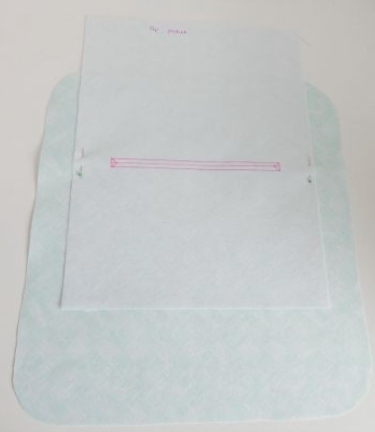
Fold the slip pocket (M) in half to form a 8” x 10” (20cm x 25.5cm) rectangle and stitch around the three sides leaving a 3” (7.5cm) turning gap. Clip the corners, then turn right side out and press well, ensuring the turning gap is pressed under.
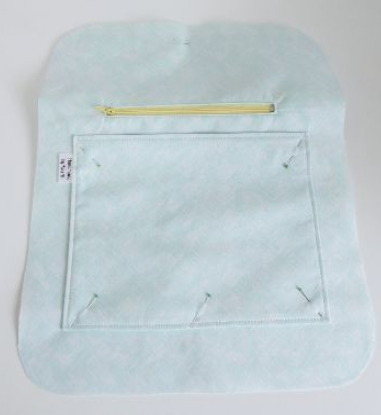
Top stitch along the top folded edge of the slip pocket (M) and then position on the same lining body main (A) as the zip pocket is attached, 2” (5cm) from the bottom. You will need to pin the zip pocket out of the way.
Stitch around the sides and bottom of the slip pocket (M), closing the turning gap. If you wish to divide the pocket into two, mark the centre of the pocket and then stitch from the bottom of the pocket to the top, back stitching at the top.
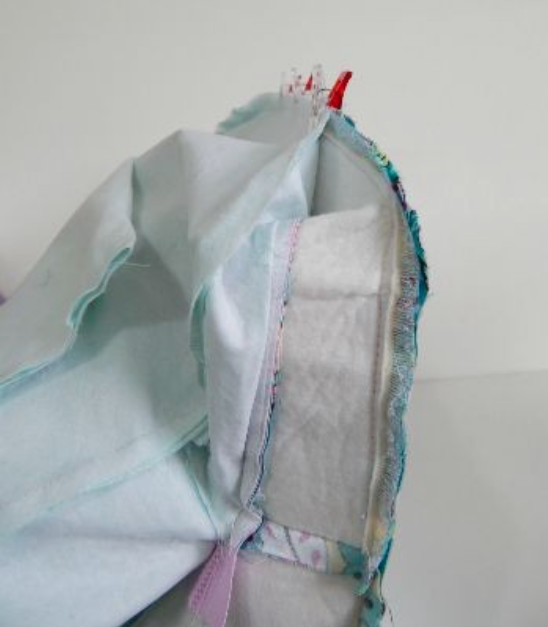
Attach the lining
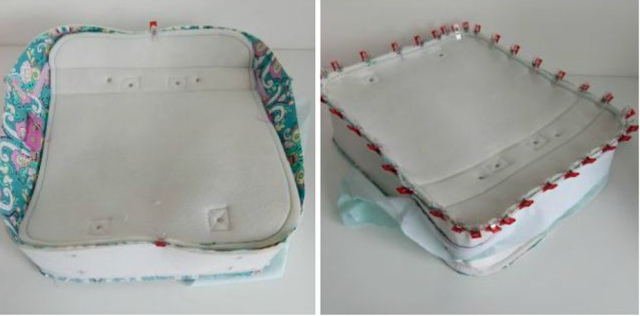
With the bag inside out, pull one of the zip gusset lining pieces over the zipper opening and pin it to the right side of one lining main panel (A), matching centres.
Then tuck the bag outer down, out of the way, and continue pinning the lining zip gusset and side gusset (C&D) to the lining main panel (A). With the gusset on top, stitch around the lining and then notch the curves.
Next, turn the lining over itself, so that the raw edges of the seam just sewn are hidden and the unfinished edge of the gusset (C&D) is available.
Pull the unfinished edge of the gusset lining out, over the zip and pin to the remaining lining main panel (A). Stitch around with the gusset on top, leaving at least an 8” (20cm) turning gap at the bottom. Back stitch well at the start and end of the turning gap to reinforce it when turning.
Now pinch the seam allowances together along the top of the outer and lining. Stitch the seam allowances together, within the stitching line, approximately 1/8” (3mm) from the edge, between the corner curves. This will prevent the bag lining sagging inside the backpack.
Turn the lining through, over the bulk of the bag so that the lining is facing out, press well and then close the turning gap with a ladder stitch, or a close top stitch on your machine.
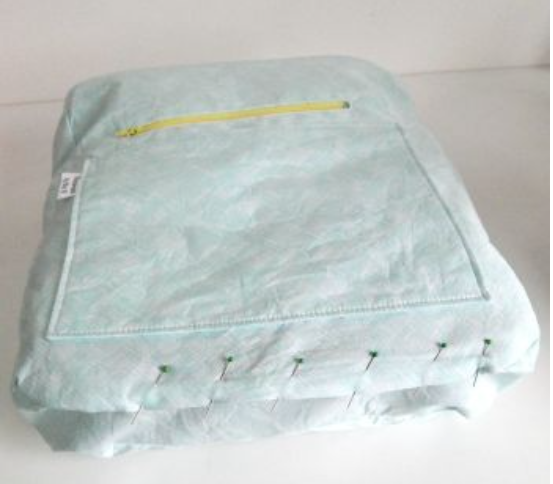
Turn the bag through the zip so that the outer is right sides out and press if needed. Almost done!
But wait, there’s one more step:
Create the cross body strap
Repeat the same stept you took when sewing the top handles to make the cross body strap. Review the steps here: Create top handles and backpack straps.
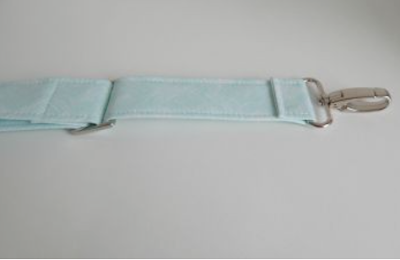
Thread one end of the strap through the triglide 1″ (2.5cm) and stitch to secure.
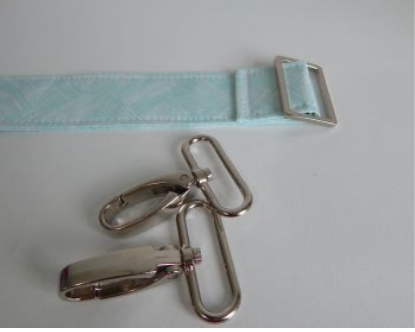
Next, thread the other strap end through the eye of a swivel clip, then through the triglide over the top of the strap you already stitched in place.
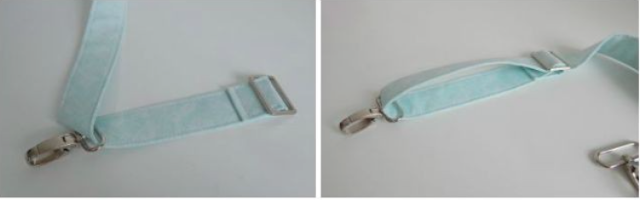
Thread the strap end through the second swivel clip 1” (2.5cm) and stitch to secure.
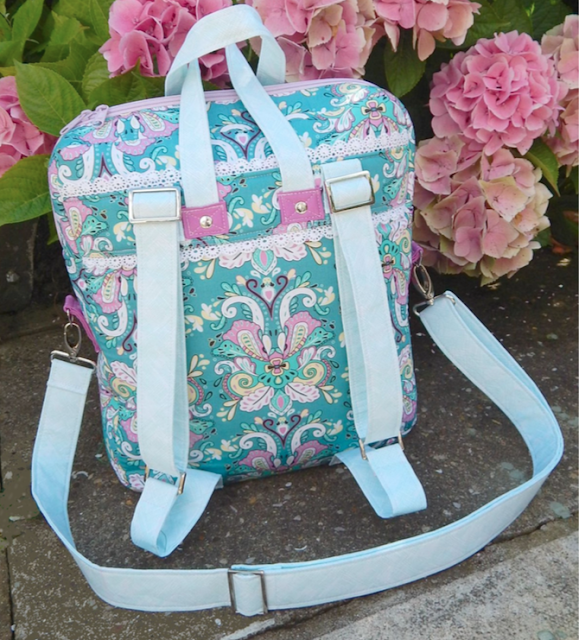
Simply clip the strap onto the triangular rings and your bag is finished!
You are now the proud owner of a beautiful Bookbag Backpack!
Thank you so much for sewing with us! We’d love to see what you make, so please leave a link of your backpack below. We’ll feature our favourite ones here on the blog!
Tags:
Leave your comment
Ten articles before and after
Blog – Tiny Bag Co – All About Tanya! Sewing Patterns by Junyuan bags
Blog – Introducing – Sewing for men Month! Sewing Patterns by Junyuan bags
Blog – Sewing for Men: Tips and Ideas Sewing Patterns by Junyuan bags
Blog – Sewing for Father’s Day – a Gentleman’s Wallet round up! Sewing Patterns by Junyuan bags
Blog – 8 Sewing Quotes to Challenge How You Think About Sewing Sewing Patterns by Junyuan bags
Blog – Sew Along Week 5: Creating the zip and gusset Sewing Patterns by Junyuan bags
Blog – Foam Stabilisers Comparison 2.0 Sewing Patterns by Junyuan bags
Blog – Leather sofas to Handmade bags! Sewing Patterns by Junyuan bags


 Mobile/What's App/Wechat
 E-Mail
 ADD
ADD


