This blog post / sew along uses The Gentleman’s Wallet sewing pattern, which is available here on the website at www.mrs-h.com/the-gentleman-s-wallet-pattern.html
—
Hi lovelies,
With Father’s day this week I thought it was about time we had a Gentleman’s wallet sew along!
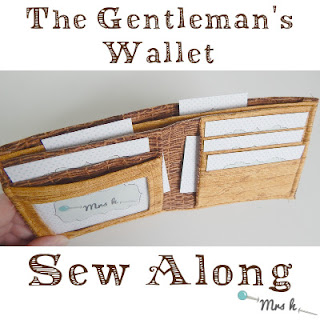
If you haven’t already got your copy, pop over and use the discount code FDAY20 (now expired) for 20% off your pattern.
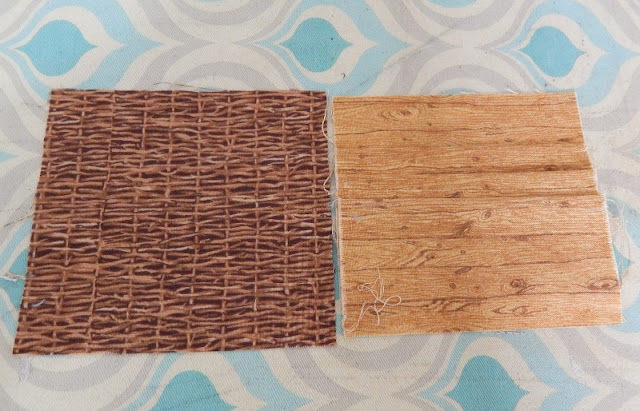
I’m going to be using these two quilting cottons for my Gentleman’s Wallet.
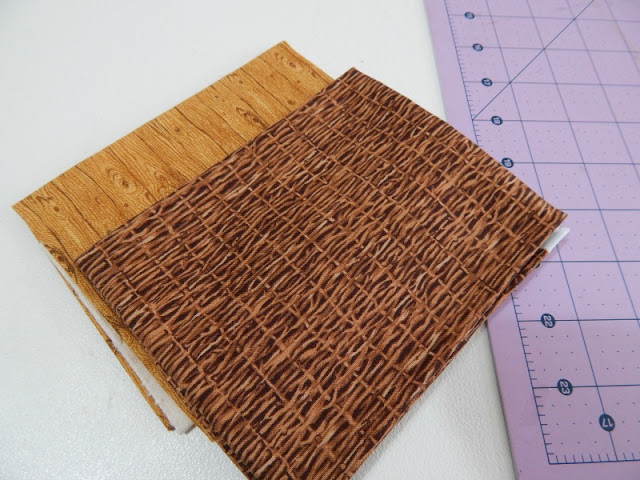
I think they’re from Makower, and they fray terribly, but are lovely weight for this pattern. This pattern LOVES thin quilting cottons. Anything thicker than cotton can be tricky to sew, and my machine is really weedy, so it has no chance of sewing this from leather!
I have seen Gentleman’s Wallets sewn from pleather and cork though, so it can be done if your machine is stronger than mine!
We’ll be preparing our pieces, then making the card slots & pockets in this post, then we’ll be finishing them up later on. This wallet should only take you a few hours to make, my first took me 3 hours, and one of my testers makes a lot, they only take her 45 minutes or so now!
I cut all of my pieces from the two pieces of fabric I had, as well as the clear vinyl, interfacing and Decovil.
If you want to use contrasting fabrics, it’s worth noting that the card slots sit on the front divider, then comes the note holder, then the back panel.
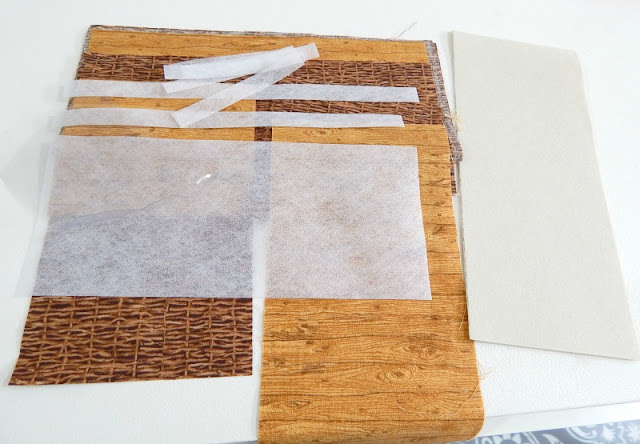
This pattern has a lot of ironing in between sewing, so if you can set up your ironing board at sitting height, near your sewing machine, you can just swivel between the two saving lots of time and effort!
Now the only piece of interfacing we need to apply right away is the front divider interfacing. All of the others get popped to one side until the instructions call for it.
Make sure you centre the interfacing, this will preserve the seam allowances around the outside without too much bulk in them. You’ll thank me for this later!

Onto the card slots! I’ve taken lots and lots of photos, but as it says in the pattern, if you’re getting confused then it really does help to ignore the photos, and just follow the written instructions!
The key to this wallet is accuracy. It has no real margin for slap dash measurements, so be sure to keep that in mind for these card slots especially.
In my photos I’ve tried to keep the short end with ‘TOP’ written on, on the left hand side. I’m only ever flipping this piece of fabric from front to back horizontally, never side to side.
Ok, right card slots, let’s go!
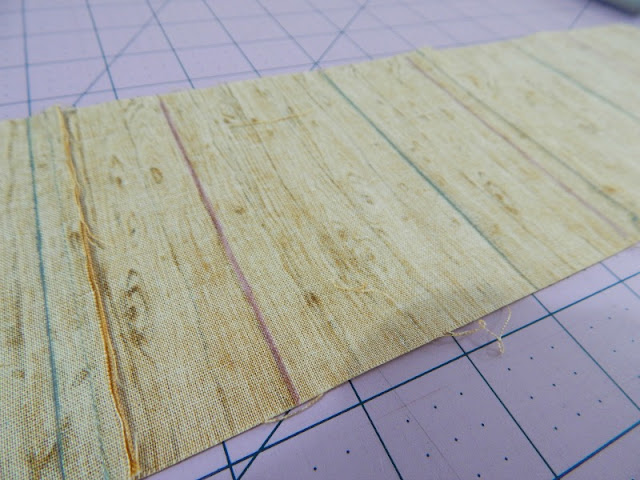
I’ve used grey chaco liner for some measurements, and purple air erasable pen for the highlighted ones. Don’t use a frixion pen for these, you need these marks to last through ironing! My purple air erasable pen doesn’t disappear in the air as soon as it’s ironed, which makes it perfect for this wallet.
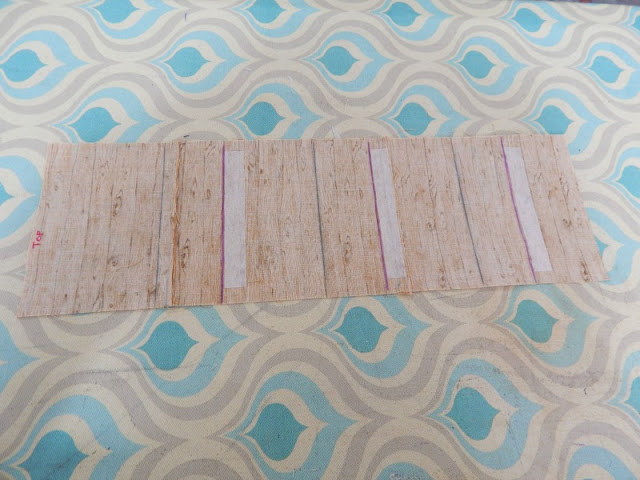
After drawing your lines according to the pattern, apply three of the interfacing strips to the right side of the purple lines. Note these too are kept out of the seam allowances, and my TOP is still on the left.
The first fold we’ll make is right sides together, so flip your piece over so that the right side is facing up, and the TOP still on the left. The fold the TOP to the right, so that the piece folds along the first line you made. Press this well.
Now flip your fabric piece back over so that the wrong side is facing you. Now fold it back on itself, wrong sides together, along the most left interfaced line (my purple one). Your fabric should look like the middle picture below now.
Flip your fabric over again so that it looks like the last photo above. You’ve made your first card slot!
Now with your fabric that way up, bring the left hand side, to the right, folding along the middle grey line, the next one waiting to be folded along, right sides together and press well. Your fabric should look like the photos below.
Now flip your fabric back over so that the wrong side is facing you, and fold along the second interfaced line, again, my purple one, wrong sides together, so that it looks like the photos below.

Now flip your fabric back so that the right side is facing up. It should look like the photo above on the right, with two card slots! Don’t worry if yours is slightly less long than mine, I think my photo has stretched!
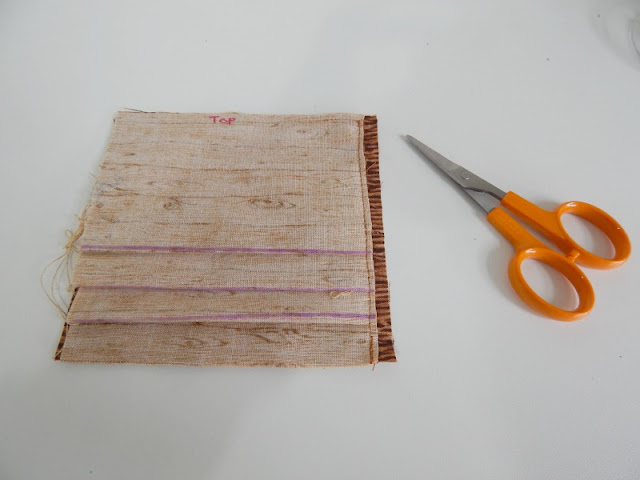
With your fabric right side up, fold along the last grey line, right sides together. Now that your fabric is folded, the TOP is now actually on the left, as you can see in the first photo below!
Flip the fabric again, it should look like the middle photo below, and then fold, wrong sides together, along the final interfaced (purple) line. It should look like the last photo below.
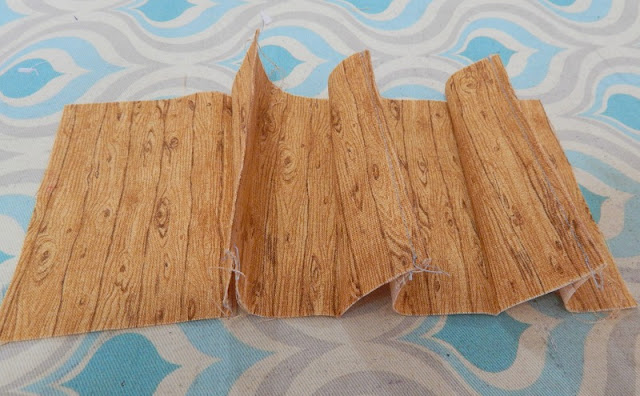
Your right card slots should now look like the fabric piece below, with three slots. Don’t worry if it doesn’t look as long as mine, this photo seems to have stretched too!

Check your card slots against one of the card backs to check they’re the same height. If they’re wildly different, then double check your measurements.
I had real trouble working out why one of mine was massively too long, turns out I was using the 7/8 marking instead of the 5/8 marking on my ruler, oops!
Once you’re happy it’s more or less the same, you can top stitch each fold.
After top stitching, fold it all back up again, and lay it right sides together on top of one of the card back pieces. I like to pin through every fold, but this is definitely overkill!
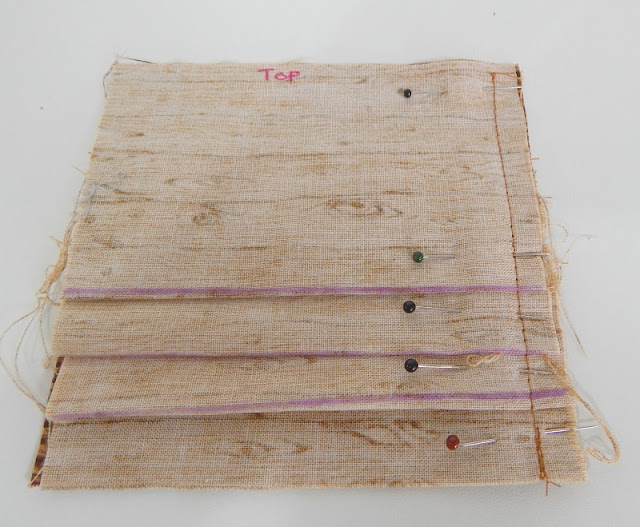
Stitch just along the RIGHT hand side of these card slots as you can see above, then trim the seam allowance of the card slots, leaving the card back seam in tact.
Open this panel out, and press well, then turn the back to the back, so that this piece is wrong sides together.

Press well along the folded edge so that the card backing is not showing behind the card slots.

If you have a lovely powerful sewing machine you could top stitch that folded edge, but it’s not necessary, so you don’t need to.
You will need to baste the right hand side as shown below, within the seam allowance. You can trim off any random overhang bits so that the card slots edge matches the card back edge.

That’s the Right card slots done! Time for the Left!
The left card slots only has one slot, this’ll be a walk in the park after the right ones! This piece of fabric only needs two lines drawing on it, and a piece of interfacing fusing to the right of the second line. I wrote ‘TOP’ again on this piece to help myself.

To begin folding, flip the fabric right sides up, then fold along the first (not interfaced) line, right sides together, so that the TOP is now in the middle (ish) of your piece as below.

Flip the fabric over, and it should look like this photo underneath.

Fold wrong sides together along the pink line with the interfacing attached, it should look like the photo below.

Flip the fabric over to the right side, and you should have one card slot, the bit I am pinching is where you should top stitch.

Now you’ll need to make your ID pocket. I find it easier to draw my box before pinning the two pieces of fabric together.

I like to write TOP at the top of this one too as the gap above the window is bigger than the gap below. It’ll also help me remember which side is my lining!


After sewing around the box (like you would for a zip pocket), then it’s time to rid ourselves of the extra fabric.

Before I turn the fabric through, I usually press the lining up and away from the outer, to help form a lovely neat turn.

Then when I turn through, I like to press on the outer side, one edge at a time, before pressing the whole thing.

I just think it makes for a neater ID window!

Now it’s time for structure, fold the lining down out of the way, position the interfacing and fuse into place.

Then flip it, and trim off the top of the lining as per the pattern.

By trimming the top, it’ll help us get a really neat 1/4″ double rolled hem along the top of the pocket without too many scorched fingers (hopefully!)


After you’ve folded the top over the lining, then the whole top down another 1/4″, it’s time to slot the vinyl in to place, under the folded down top. You may find some basting glue/tape really helps with this!

Then you can stitch along the top hem, and around the 4 edges of the open window to hold the vinyl in place. I found that using my walking foot meant I didn’t have to worry about the vinyl giving me any issues!

Last things last, pop the ID pocket on top of the left card slots and baste around the sides and bottom to hold it all together.

You’ve now got two pockets, one for a card, one for ID! (Or one for a pins pot lid, one for a pair of scissors)

If you want to pop a velcro coin pocket in using my tutorial, now is the time to do that, and then we’ll pop our left card slots (with ID pocket) on top of the card back and sew together, just down the left hand side.

Now we’ll grade the seam allowance, I like to do this by trimming the seam allowance of the card slots and ID pocket, but leaving the card back as it is.

Turn the left card slots so that it’s wrong sides together and press well, without melting your vinyl! Again, you can top stitch the right hand side if you like, but it’s not necessary.
You will need to baste the left and bottom of these, just to keep everything from flooping around.

We’re very nearly finished our pockets, so let’s get those done before it’s time for a cuppa!
With one front divider facing up, lay the left card slots and the right card slots on top, matching the raw edges at the sides and bottom. I have used basket weave for my front divider that will be seen, and plain for the backing.

Lay the backing of the front divider on top of your front divider and card slots, and clip, then sew just along the very top of this piece, with your usual seam allowance.

Turn the panel over, and trim away the seam allowance of the card slots and front divider.

Pull the panel open, and press well.

By doing this extra press, it means that the backing will fold down neatly behind the front divider.

Once folded down, top stitch along the top edge, and then baste around the other three sides.

We’re making excellent progress now! Let’s stop for a cuppa, and come back to finish this Gentleman’s Wallet off in a little bit!
Part two of The Gentleman’s Wallet Sew Along is now available here: https://www.mrs-h.com/blog/gentlemans-wallet-sew-along-2/
Ten articles before and after
Blog – The Gentleman’s Wallet Sew Along {Dividers and Finishing} Sewing Patterns by Junyuan bags
Blog – Sewing Waxed Canvas {Sewing for Men guest post by Betz White} Sewing Patterns by Junyuan bags
Blog – Bag of the Month Club January – June ’16 Round-up Sewing Patterns by Junyuan bags
Blog – The Top 5 Sewing Blogs Written by Men Sewing Patterns by Junyuan bags
Blog – Choosing man fabrics {Sewing for Men} Sewing Patterns by Junyuan bags
Blog – Using Kraft-Tex for bags {Sewing for Men} – And a DISCOUNT!! Sewing Patterns by Junyuan bags
Blog – Sewing for Father’s Day – a Gentleman’s Wallet round up! Sewing Patterns by Junyuan bags
Blog – Sewing for Men: Tips and Ideas Sewing Patterns by Junyuan bags


 Mobile/What's App/Wechat
 E-Mail
 ADD
ADD


