This blog post / sew along uses The Gentleman’s Wallet sewing pattern, which is available here on the website at www.mrs-h.com/the-gentleman-s-wallet-pattern.html
—
Hi lovelies,
It’s time for part two of our Gentleman’s Wallet sew along! You can find part one here.

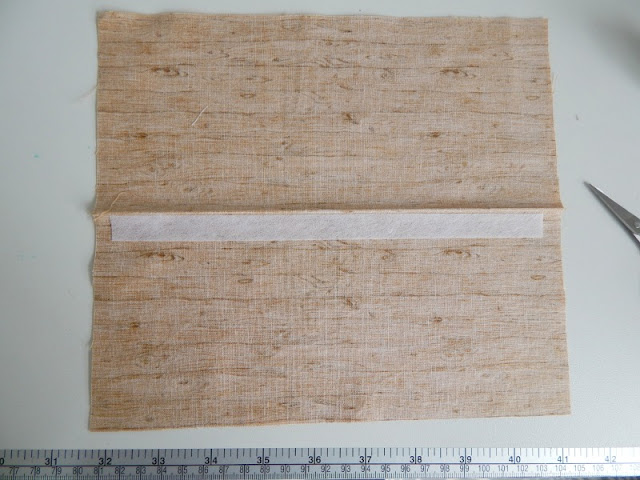
We’ll start with our Note holder panel, and fold it in half, then press to get the centre crease. Then we’ll add our interfacing just below the crease line. The crease will form the top of the pocket, so it’s helpful to have that bit of extra stability.
Next, with the Note holder face up, we’ll add the Front Divider panel we created earlier, with the card slots attached. Lay it on top of the Note Holder panel, matching side and bottom edges.
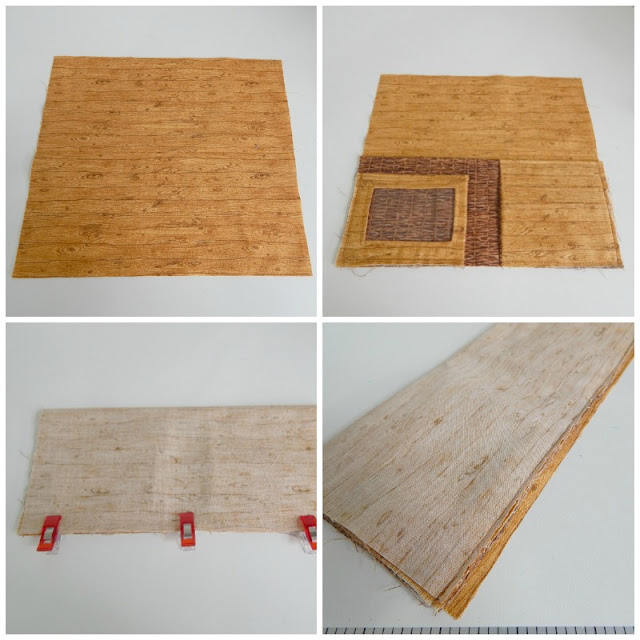
Then fold the top of the Note Holder down to meet the bottom raw edge, stitch, and then trim the seam allowances of the card slots and front divider, leaving one seam allowance from the Note Holder in tact.
Turn the whole wallet through one of the short ends and you’ll end up with the picture on the left below.

Give it a good press, and then fold it under the card slots and front divider.
I like to use clips along the bottom edge to help everything stay folded crisply until it’s time to use this section again.
Baste along both short edges, then pop this to one side until a little later.

Now we’re on the home straight, sewing the back panel.
Below you can see that I’ve folded it in half, stitched it, graded the seam, and then applied the final piece of interfacing as the pattern instructions tell you.
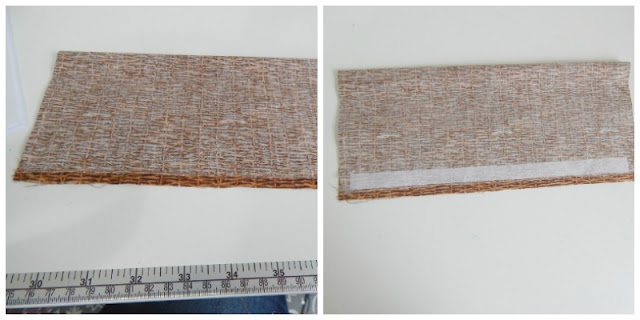
Now it’s time to turn it out the right way, and give it a press. The edge with the seam on will become the top of the Back panel. Pop the Decovil inside, and make sure it’s butted right up against the seam edge. It should also have equal seam allowance on either side of the Decovil within the Back Panel.
Once you’re happy with it’s position, fuse it into place, by pressing over the entire Back Panel with your iron.
Top stitch along the seam edge of the back panel, then it’s time to assemble!
Remember the pockets we put to one side earlier? It’s time to retrieve it and take off those clips you left on to keep it flat.
Then lay the panels right sides together (so the outer of the back panel up, the ID pocket facing it) and match up bottom edges, and left raw edges. You’ll only sew the left edge to start with.
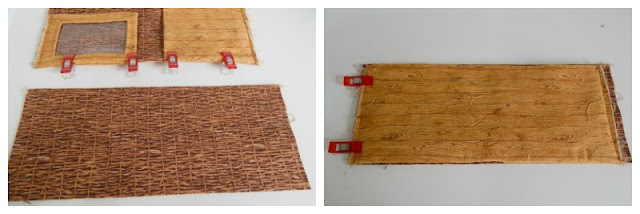
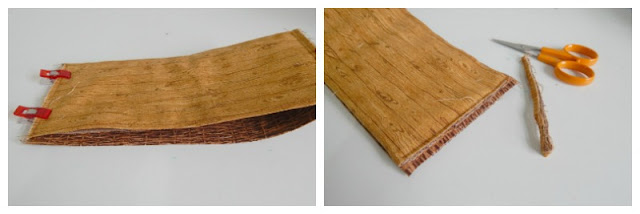
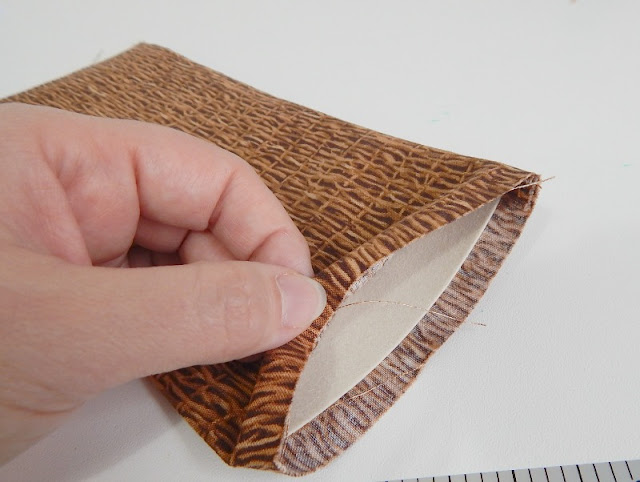
Then you’ll need to curve the Back panel slightly (above left) so that you can match right raw edges and stitch. Then trim the seam allowance of everything apart from the Back Panel as shown above.
Pull the two panels apart, this is the hole you’ll turn through.

With your fingers, roll the right hand wallet seam until it sits nicely, and then press with steam to hold it in place. Then fold the wallet in half and pop the iron on for a couple of seconds to set the left hand seam.

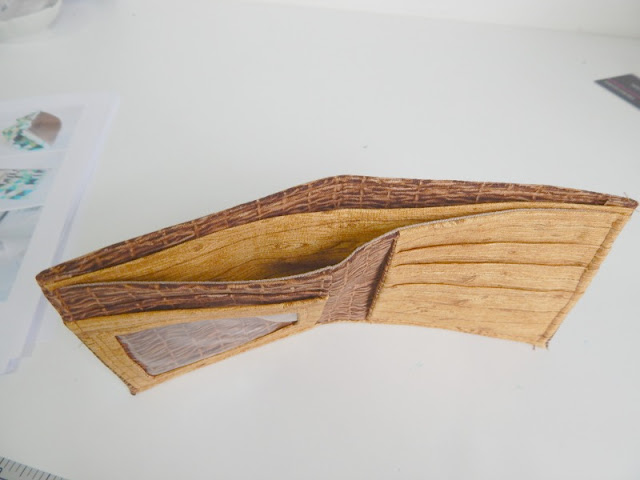
This is what your wallet should look like after pressing, before top stitching. That extra gap in the Back Panel is what helps this wallet sit like a professional wallet, instead of pulling on the contents and seams when it’s folded closed with lots of lovely paper money!
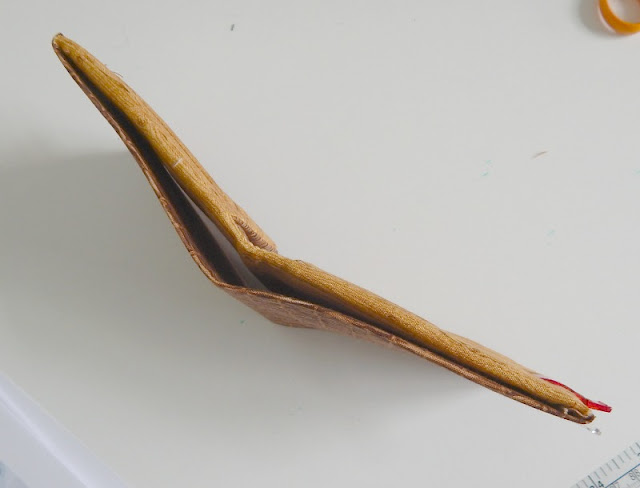
Below you can see that I’ve topstitched the right hand side, you should stitch from the top of the card slots, down to the corner, swivel and then along the bottom of the card slots. Don’t top stitch over the centre.
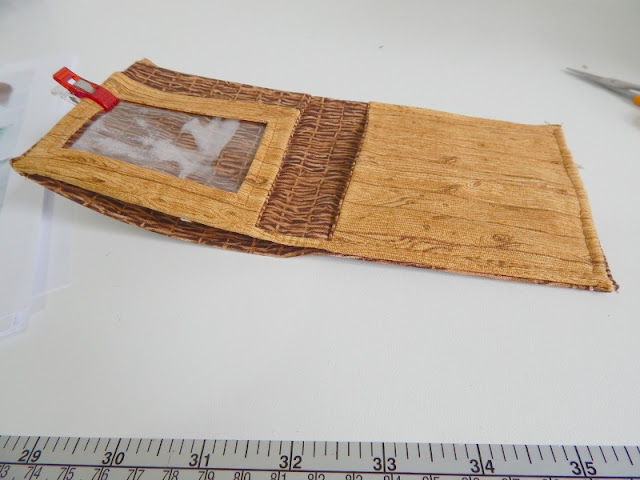
And now you can see both sides top stitched, with the centre still open. That’s how it should be!
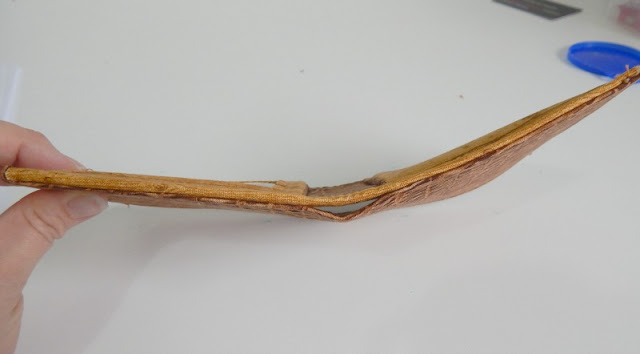
And finally, all finished!! Time for a reward, and to share on social media!
If you’ve been sewing along, why not share your Gentleman’s Wallet photos in my Facebook group? Or if you’d rather Instagram, use the hashtag #sewingpatternsbymrsh , or tag me @sewingpatternsbymrsh and we’ll find you!
 |
| The Gentleman’s Wallet has 4 card slots, 1 ID pocket, 2 hidden pockets & 2 full width note/receipt pockets! |
If you’d like to buy a copy of the Gentleman’s Wallet, you can find it in my store, don’t forget to use the code FDAY20 (now expired) for 20% off!
If you’d like to buy a finished Gentleman’s Wallet, pop me an email [email protected] telling me where you live and I’ll put you in touch with a local seamstress who can make you a custom wallet.
Thank you so much for sewing with me, it’s been a blast, I can’t wait to see your finished wallets! Who are you making yours for?
Ten articles before and after
Blog – Sewing Waxed Canvas {Sewing for Men guest post by Betz White} Sewing Patterns by Junyuan bags
Blog – Bag of the Month Club January – June ’16 Round-up Sewing Patterns by Junyuan bags
Blog – The Top 5 Sewing Blogs Written by Men Sewing Patterns by Junyuan bags
Blog – Sewing for Men month round up Sewing Patterns by Junyuan bags
Blog – The Gentleman’s Wallet Sew Along {Preparing & pockets} Sewing Patterns by Junyuan bags
Blog – Choosing man fabrics {Sewing for Men} Sewing Patterns by Junyuan bags
Blog – Using Kraft-Tex for bags {Sewing for Men} – And a DISCOUNT!! Sewing Patterns by Junyuan bags
Blog – Sewing for Father’s Day – a Gentleman’s Wallet round up! Sewing Patterns by Junyuan bags
Blog – Sewing for Men: Tips and Ideas Sewing Patterns by Junyuan bags


 Mobile/What's App/Wechat
 E-Mail
 ADD
ADD


